
Step-(1) First go to https://github.com/ARES-23247/virtual_robot
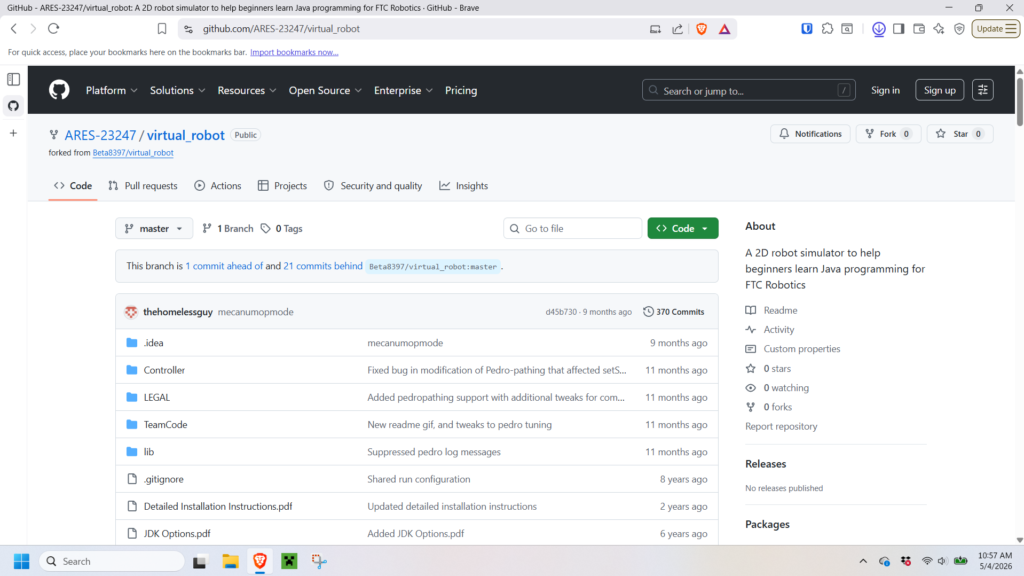
Step-(2) And click <> code Then download the zip into your downloads folder
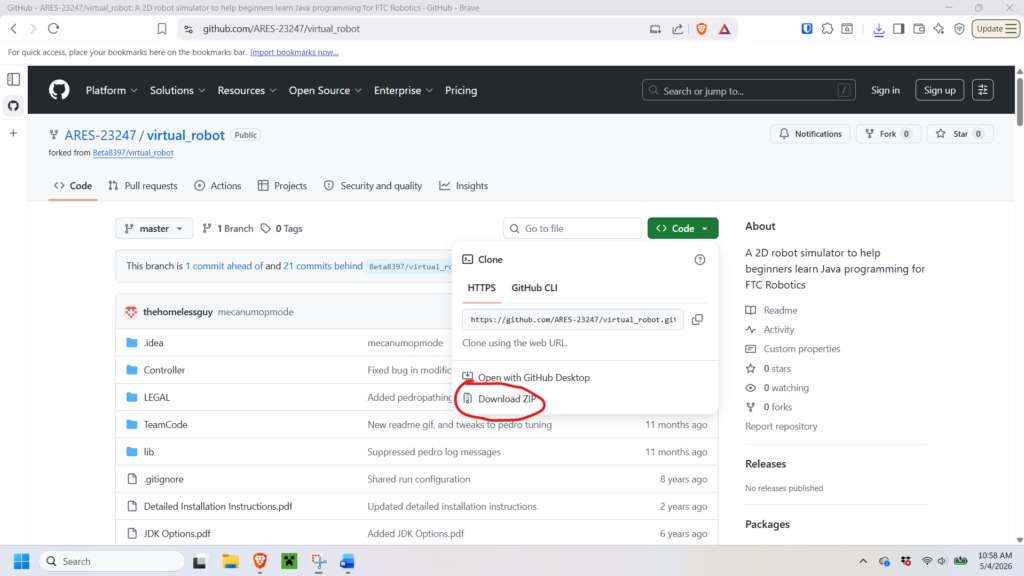
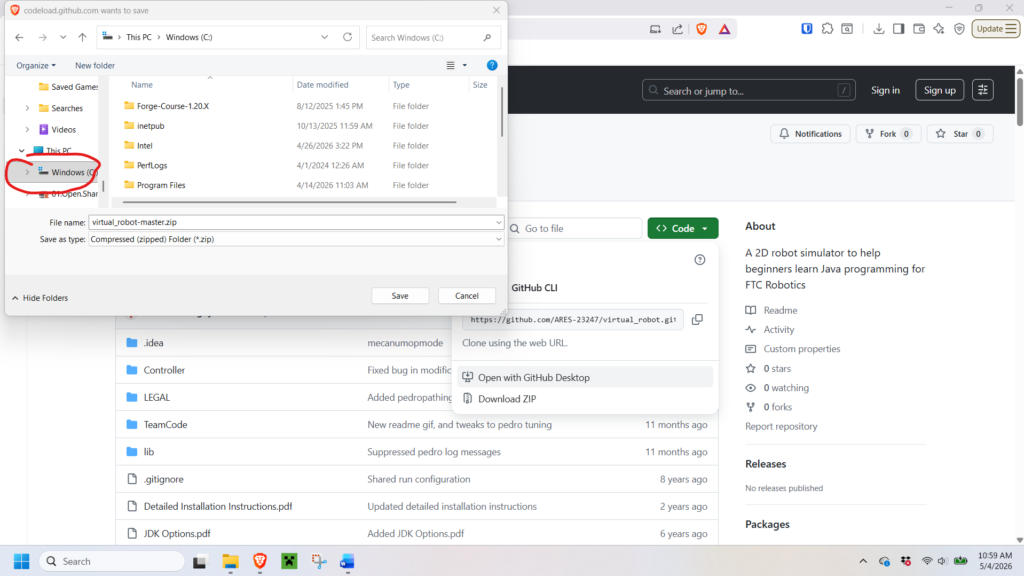
Step-(3) Next find your file in your downloads file then extract it into your C drive
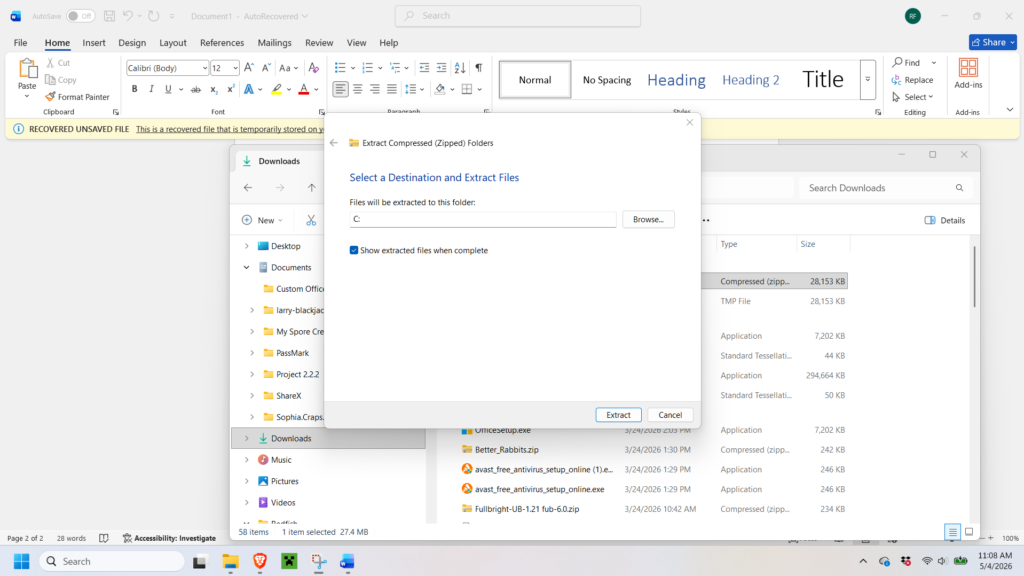
Step-(4) Sometimes your folder will extract into a new folder make sure to avoid this by opening the folder and making sure there is not a second folder with the same title and attributes inside of it
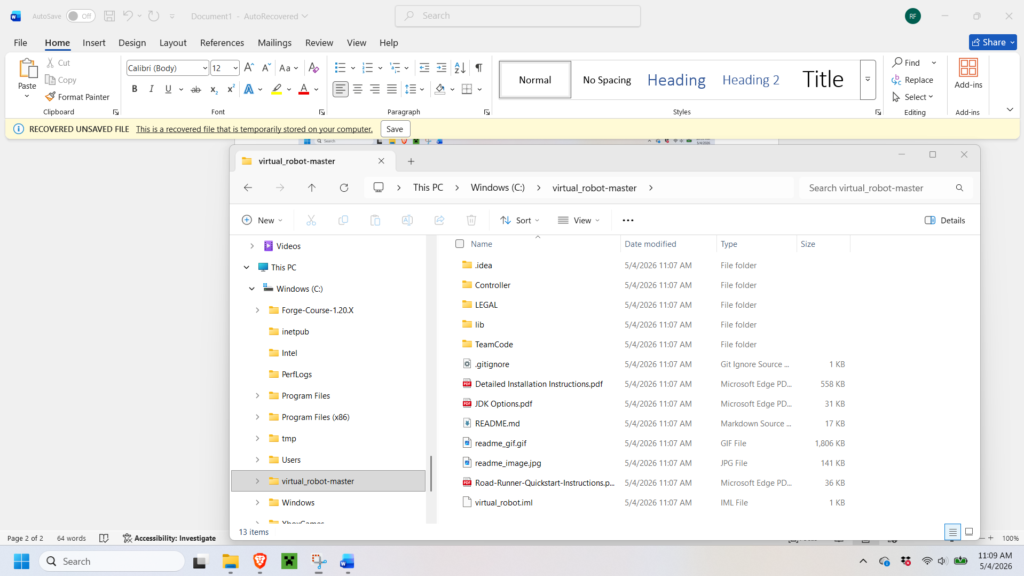
Step-(5) This is what you should see
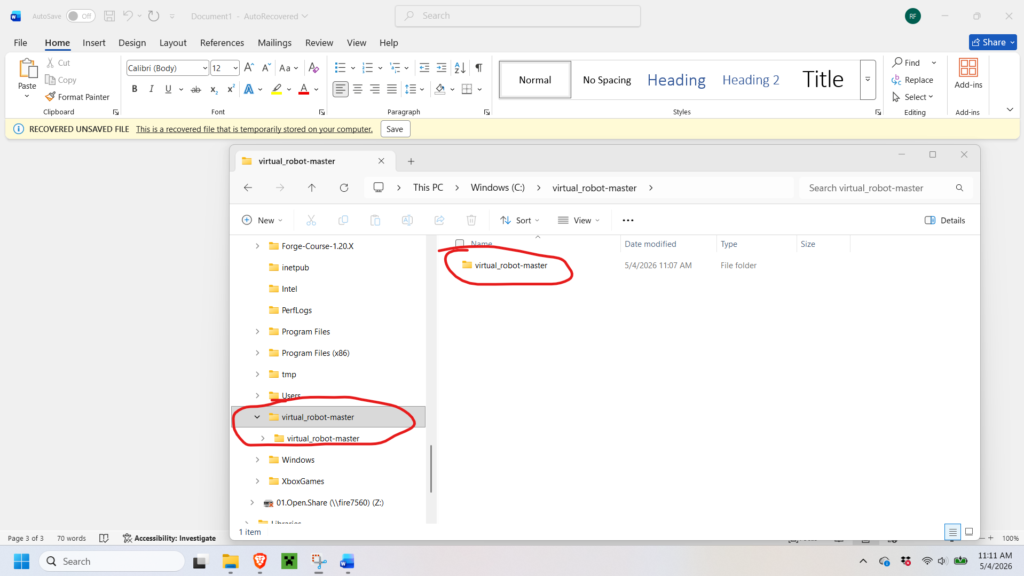
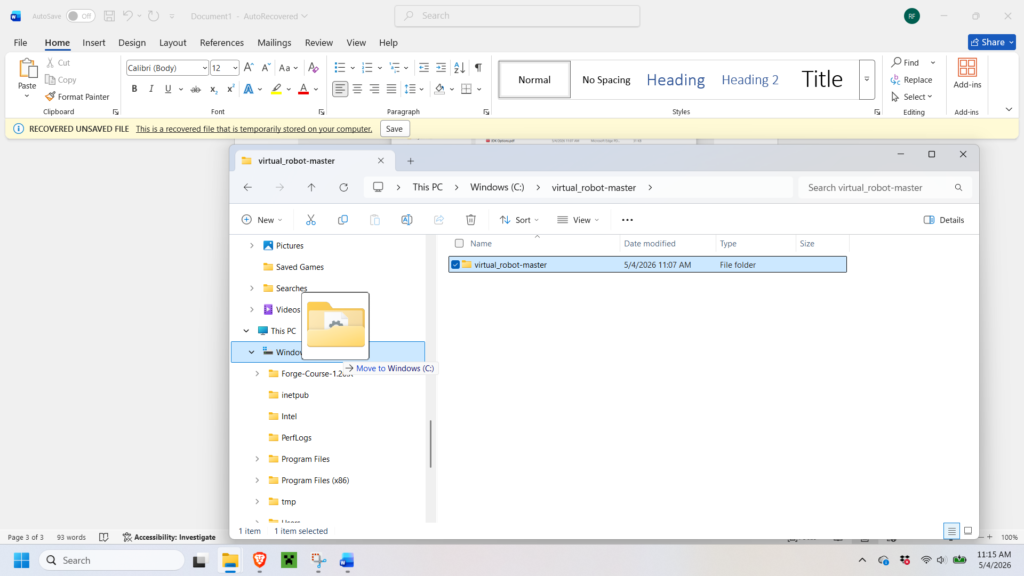
Step-(6) If you see this move the nested folder into your c drive and it will say there is already a file here with that name make sure you click replace this file
Step-(8) Next once you have the file downloaded in the correct spot you want to download the intellj community edition by clicking this link https://www.jetbrains.com/idea/download/download-thanks.html?platform=windows
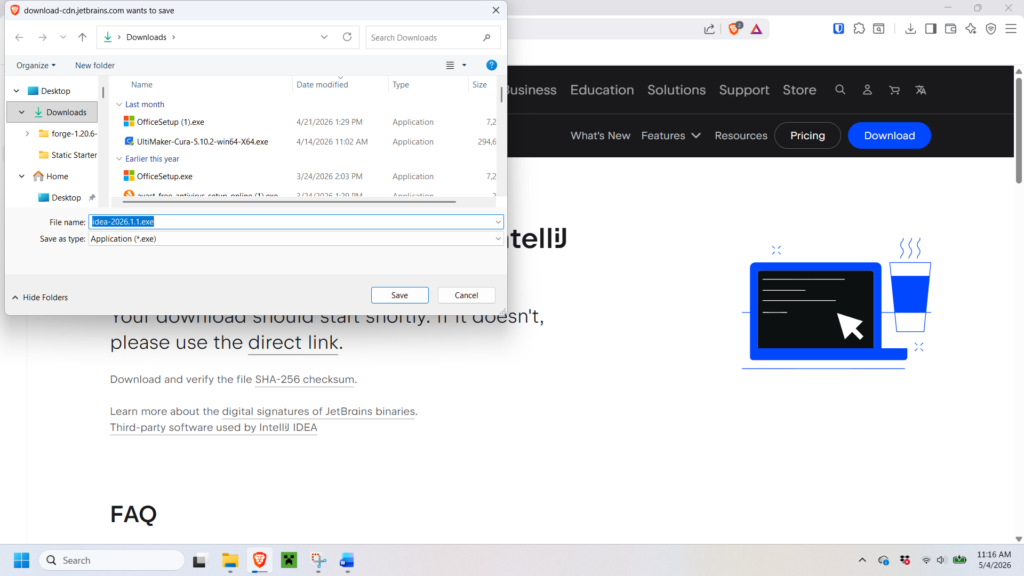
Step-(9) You should see this screen it does not matter where you save this file just save it somewhere easily accessible
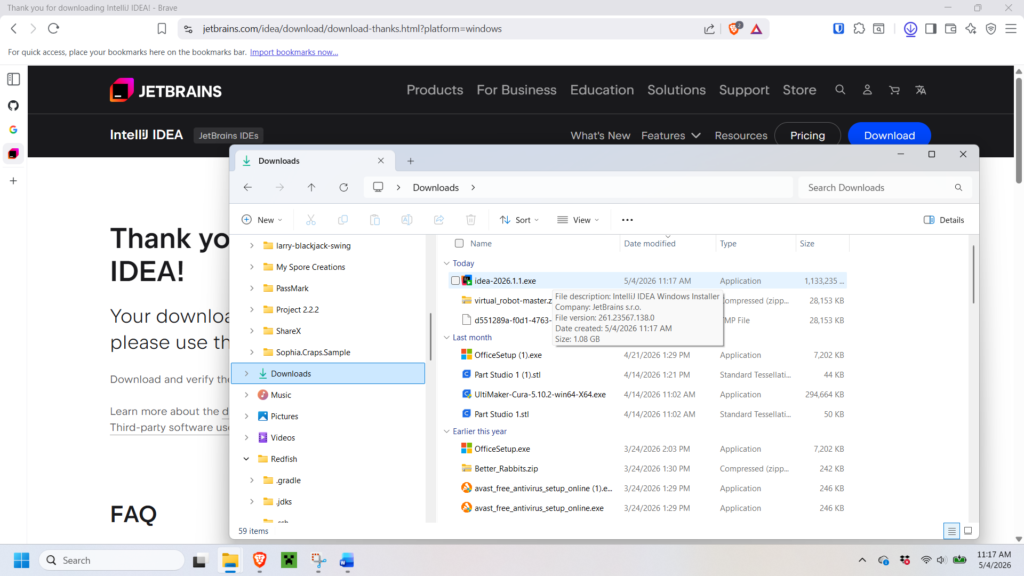
Step-(10) Once it’s finished downloading you should find this file where you saved it on your computer double click it to run it. If you get a popup saying “do you want this app to make changes to your computer” click yes
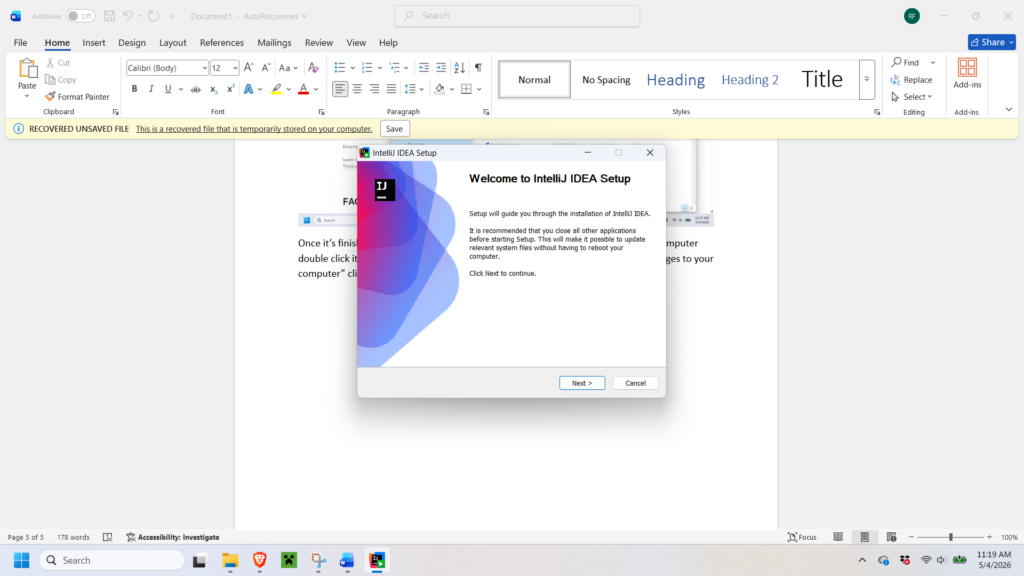
Step-(11) Click next when you get to this screen
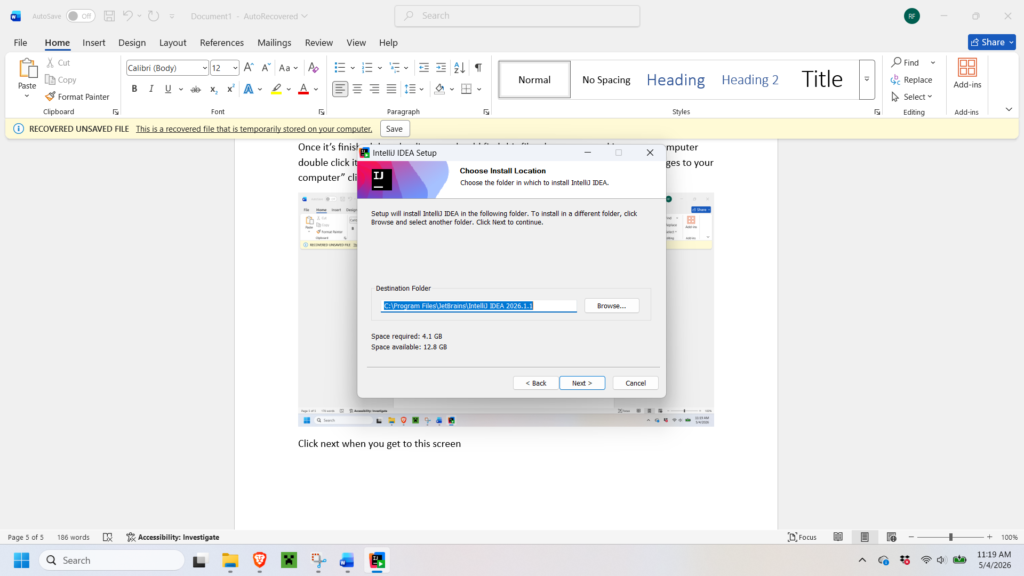
Step-(12) Accept the default location it’s saving it to and click next
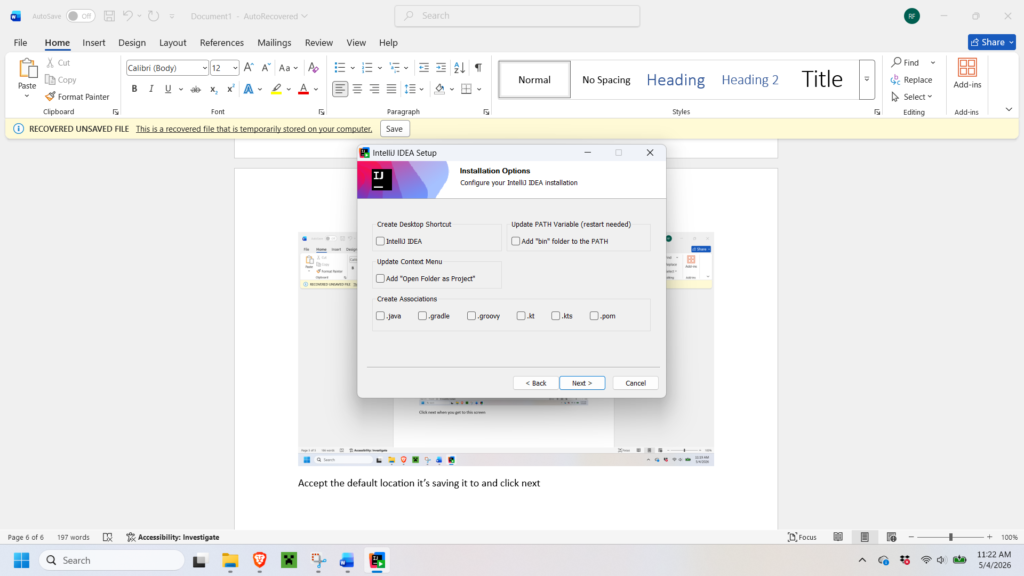
Step-(13) Again accept the default settings and click next on this step
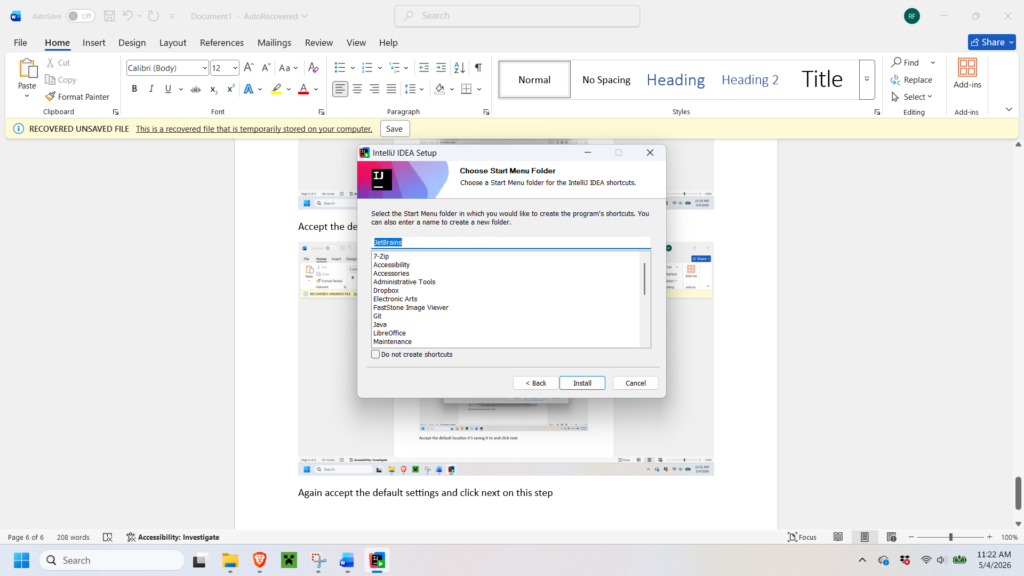
Step-(14) Accept default settings and click Install
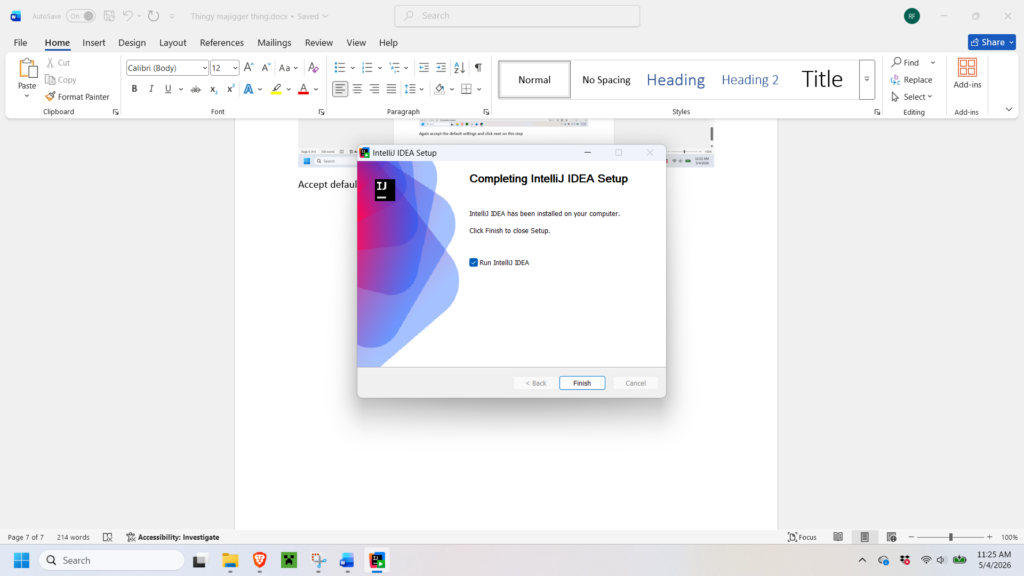
Step-(15) Once you reach this screen click Run Intellj IDEA then click finish
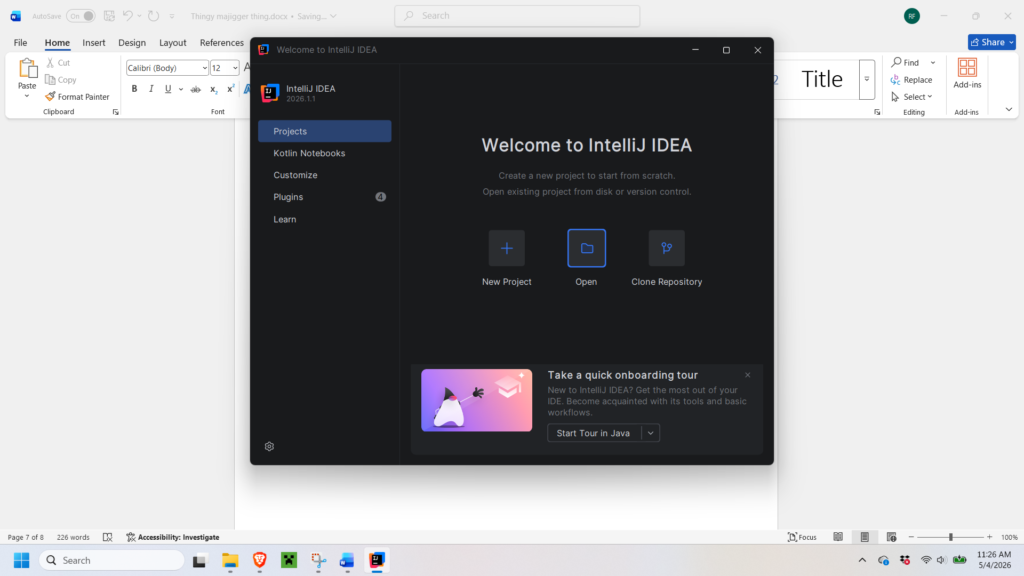
Step-(16) Once intellj has opened click the icon in the IDEA labeled Open
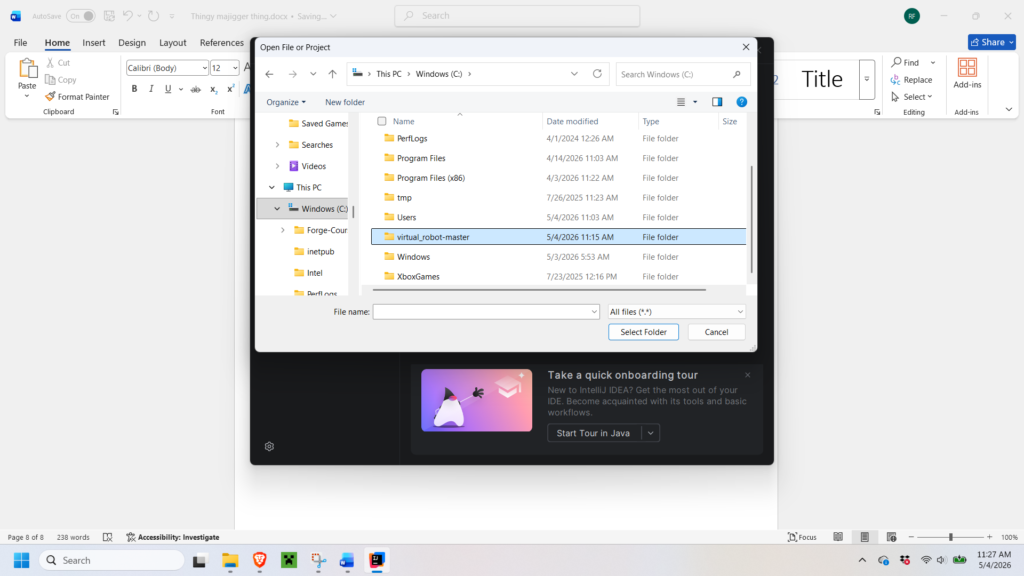
Step-(17) Navigate to your C drive and single click virtual_robot-master then click select folder
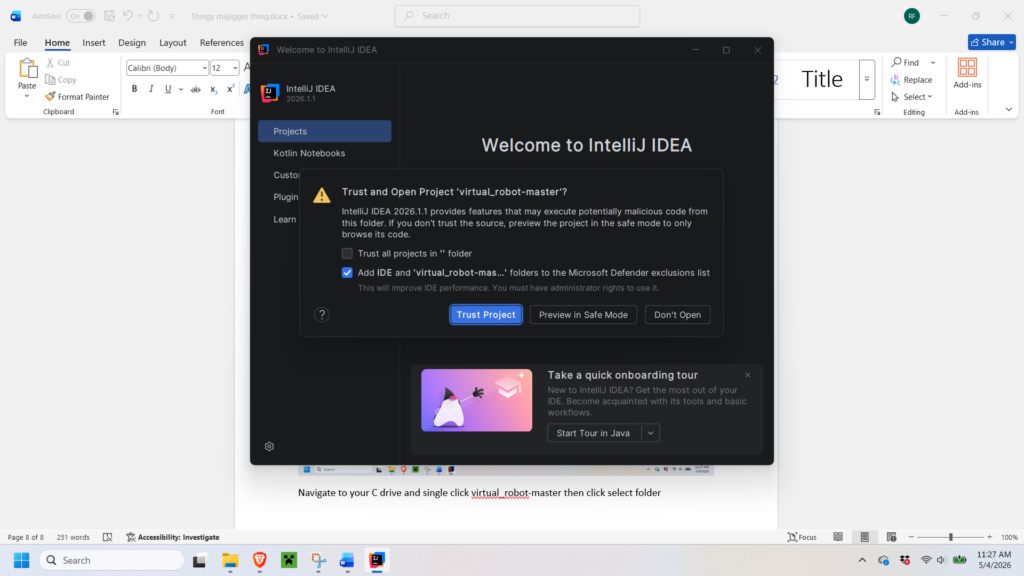
Step-(18) Make sure Add IDE is selected then click Trust Project
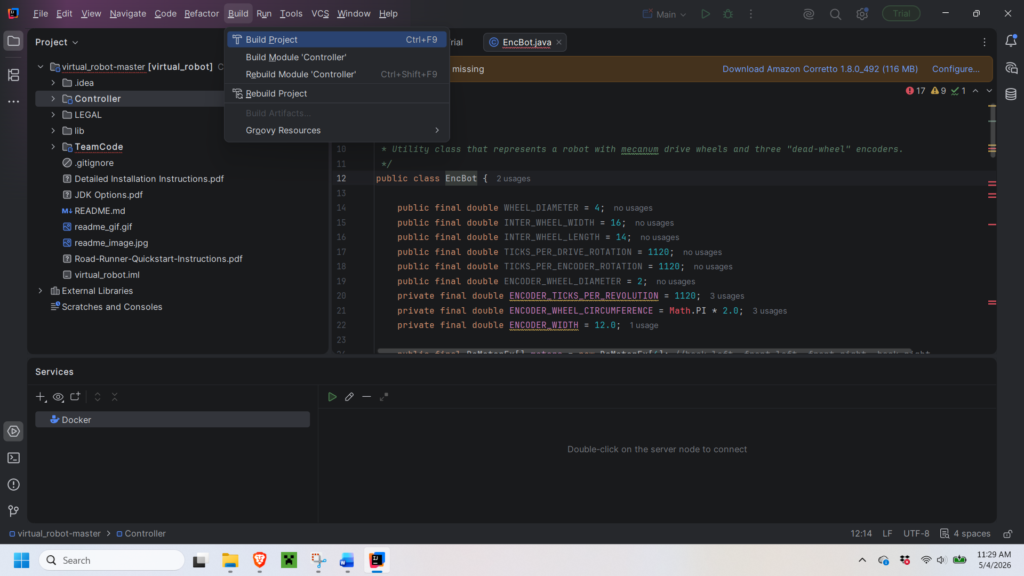
Step-(19) Press the 3 lines in the top left or alt + backslash to open this menu then hover over build then click build project
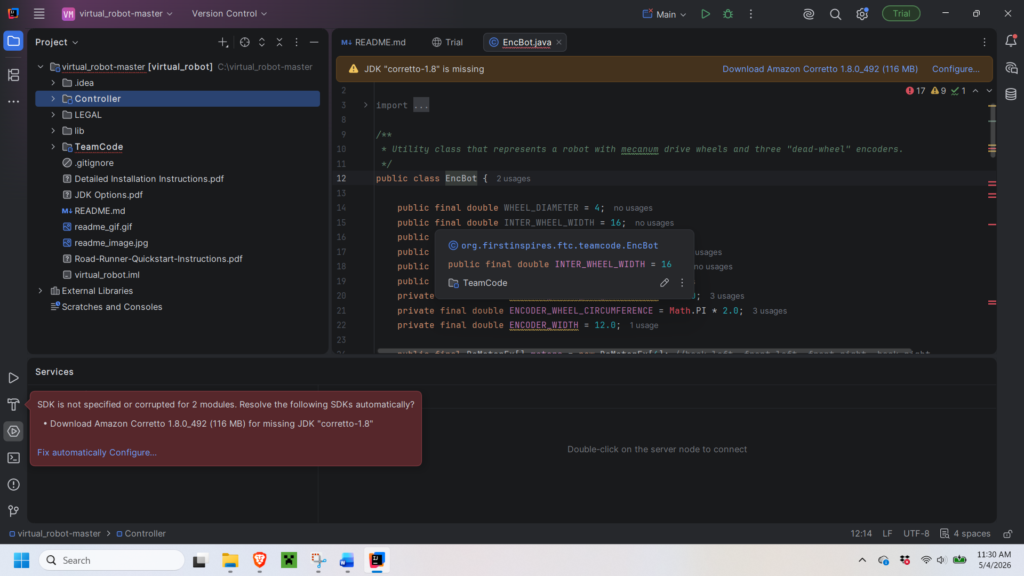
Step-(20) You should get this screen with the errors in the bottom left and the JDK “corretoo-1.8” is missing click the download link on this line to download amazon corretto
After that you’ll need to download https://download.bell-sw.com/java/17.0.19+11/bellsoft-jdk17.0.19+11-windows-amd64.msi
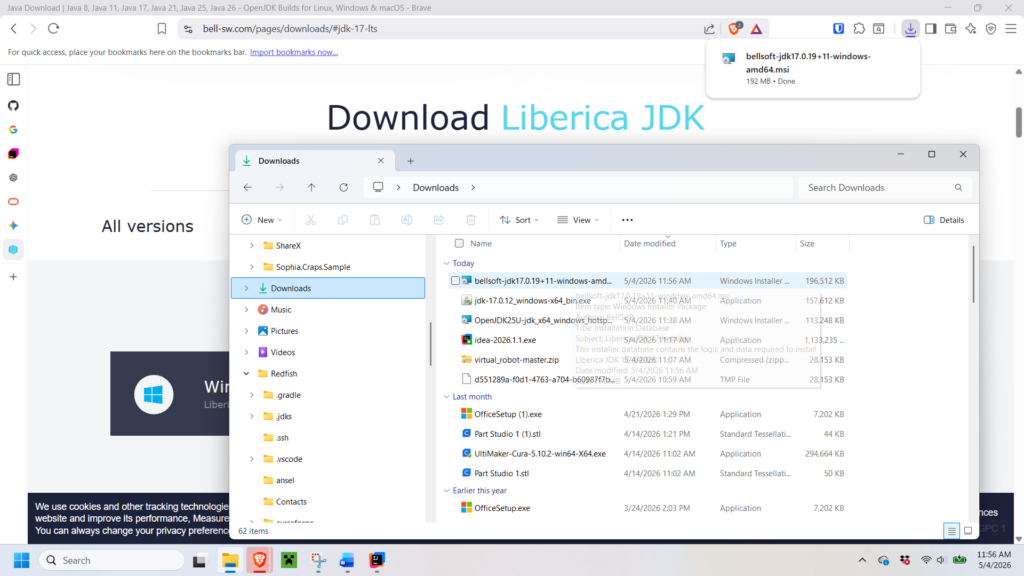
Step-(21) Once its finished downloading double click the jdk to run it Accept all the default settings then click Install and then finish
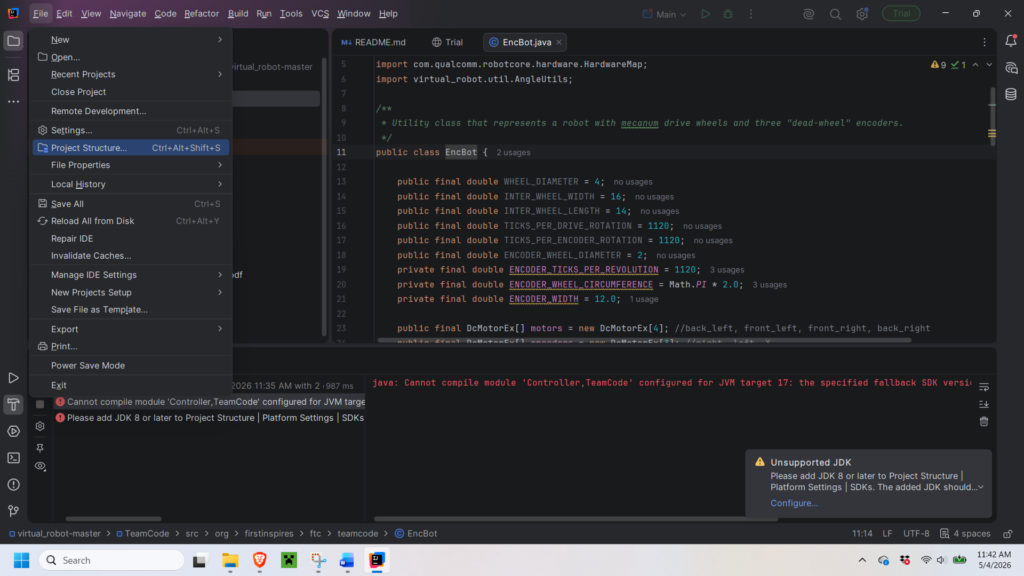
Step-(22) After you finish that go to back into intellj and click the 3 lines in the top left then hover over file and click project structure
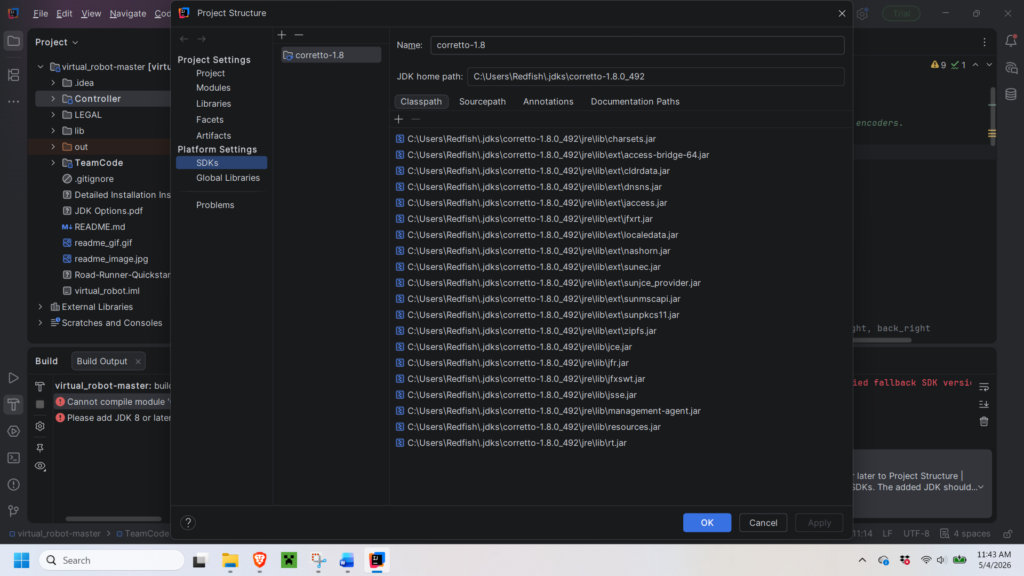
Step-(23) Once your in project structure open SDK’s
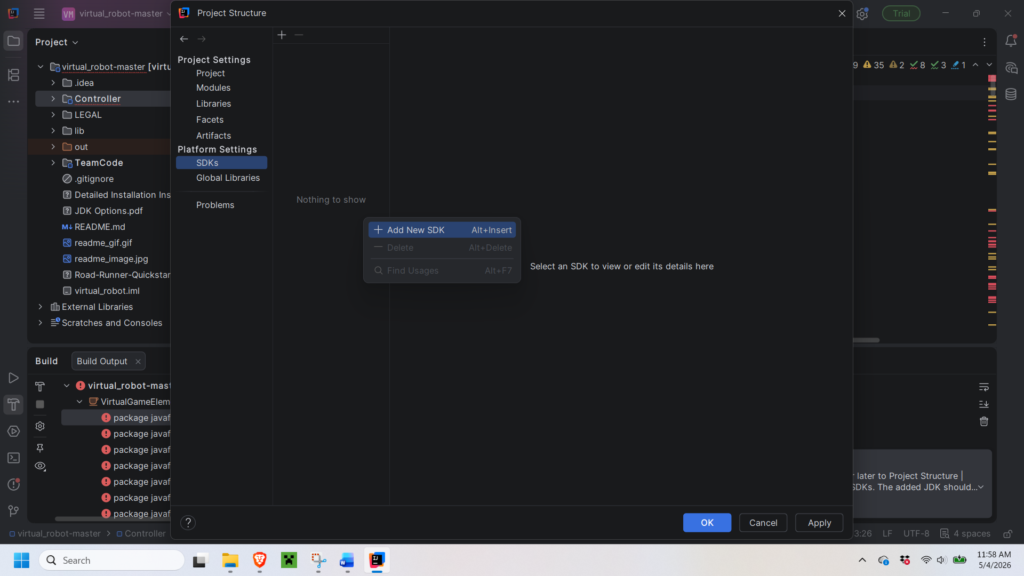
Step-(24) Right click the nothing to show and click add new sdk if there is anything already in the menu that says nothing to show right click it and delete it
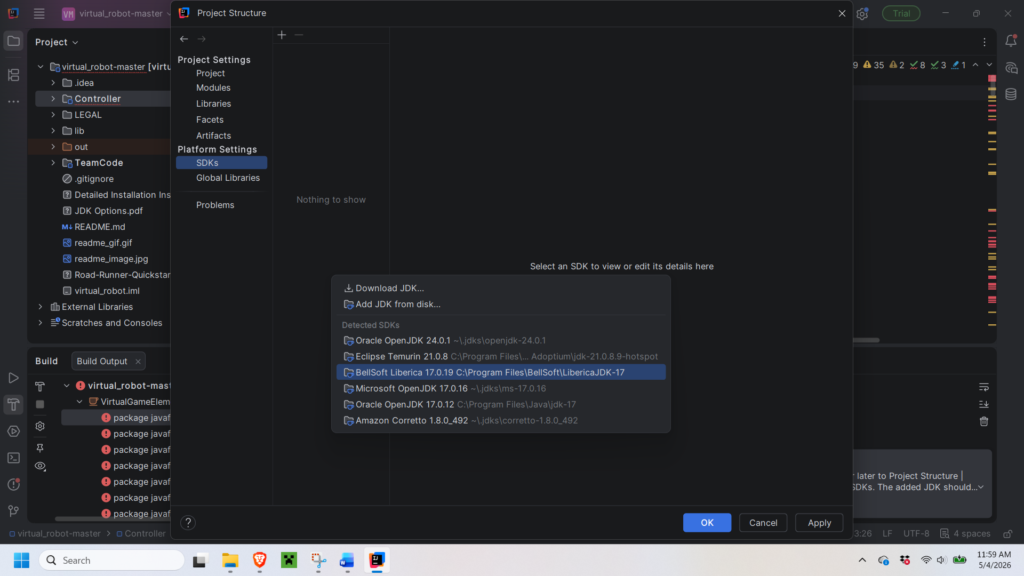
Step-(25) Click the Bellsoft Liberica 17
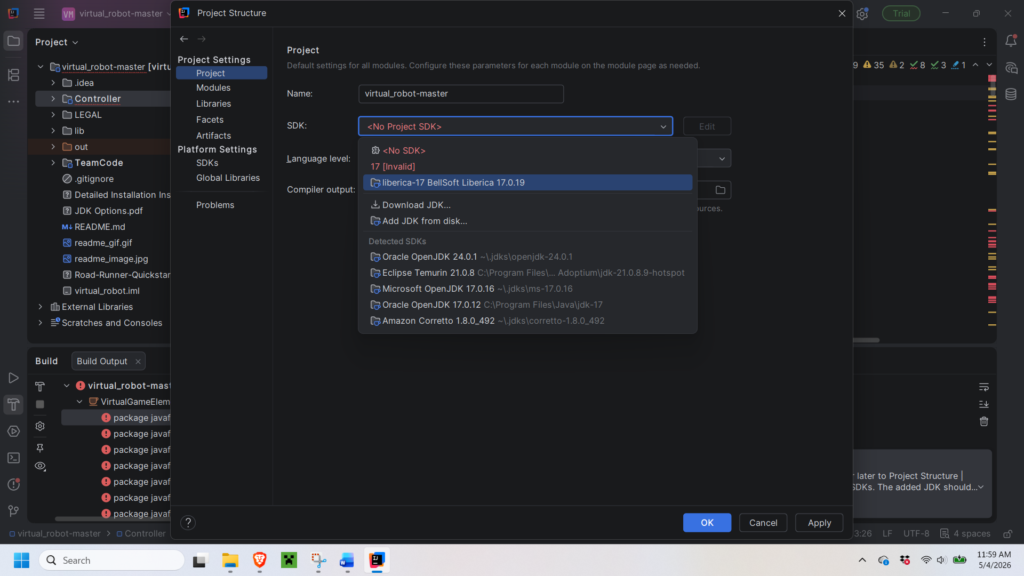
Step-(26) Then navigate to project and change the project sdk to liberica 17 click apply then ok
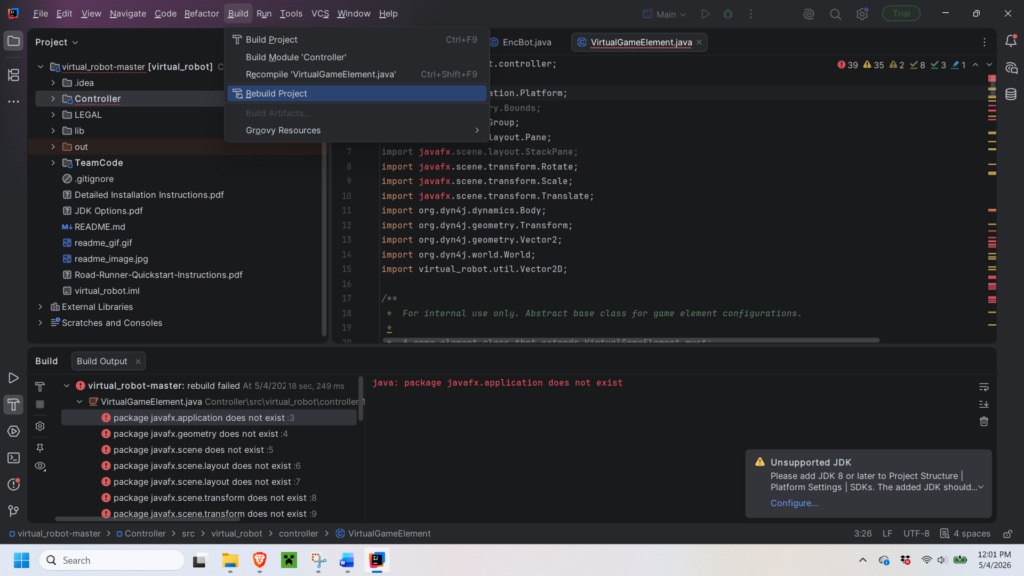
Step-(27) Navigate back to the main menu click the three lines in the top left hover over build then click rebuild project
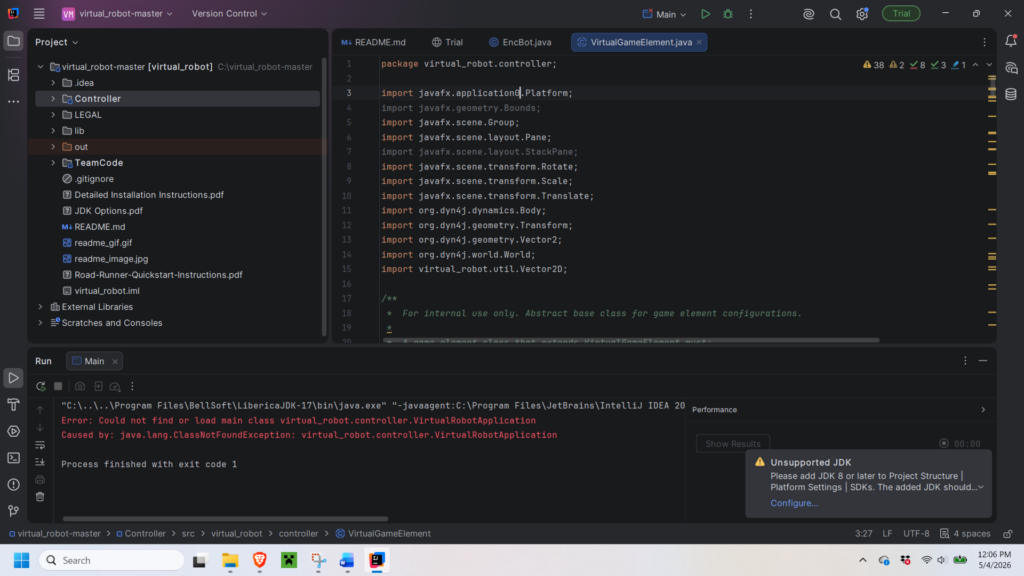
Step-(28) You should get these errors
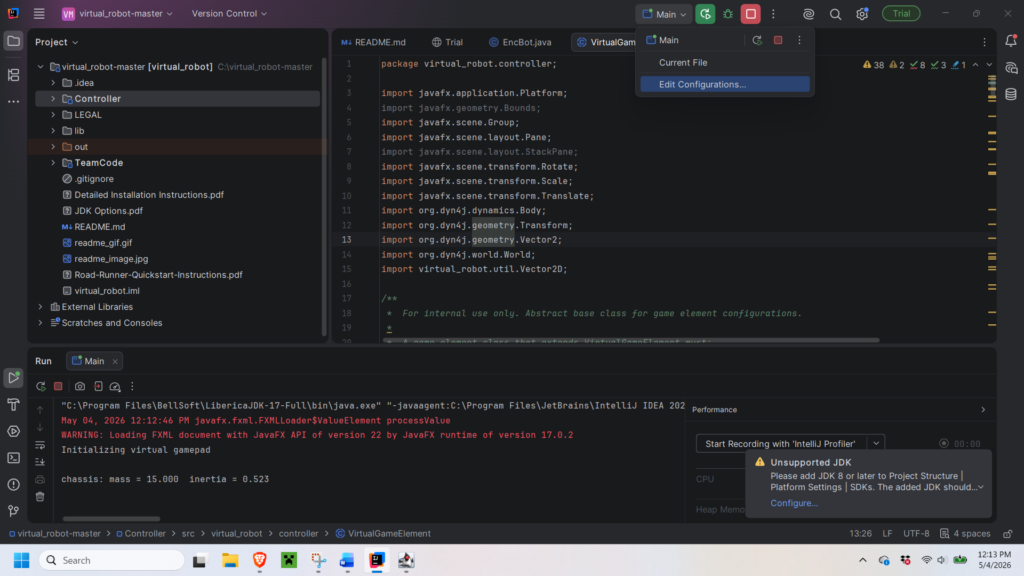
Step-(29) Click main in the top right then click edit configurations
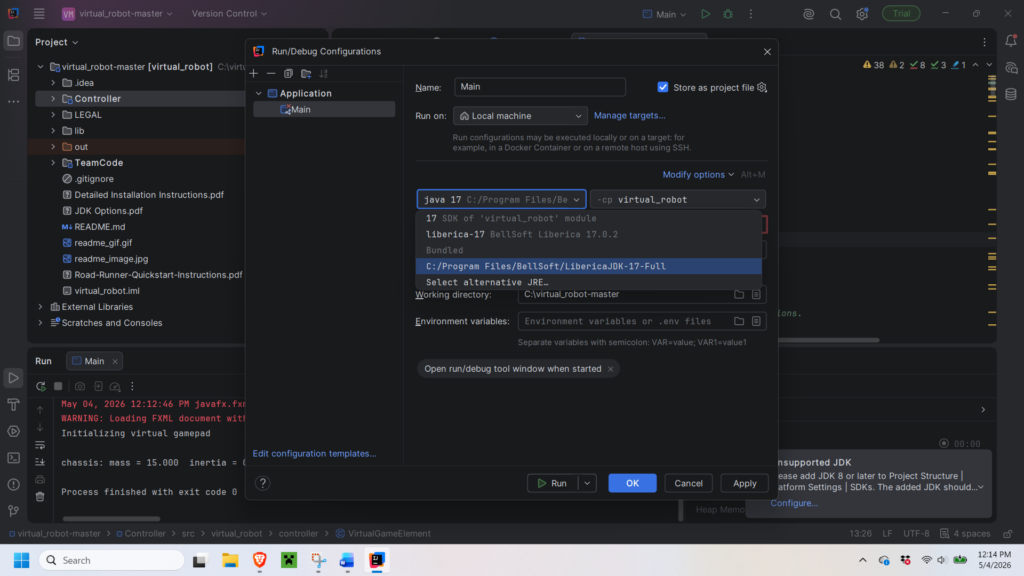
Step-(30) Open this drop down menu and make sure the version selected is the LibericaJDK-17-full
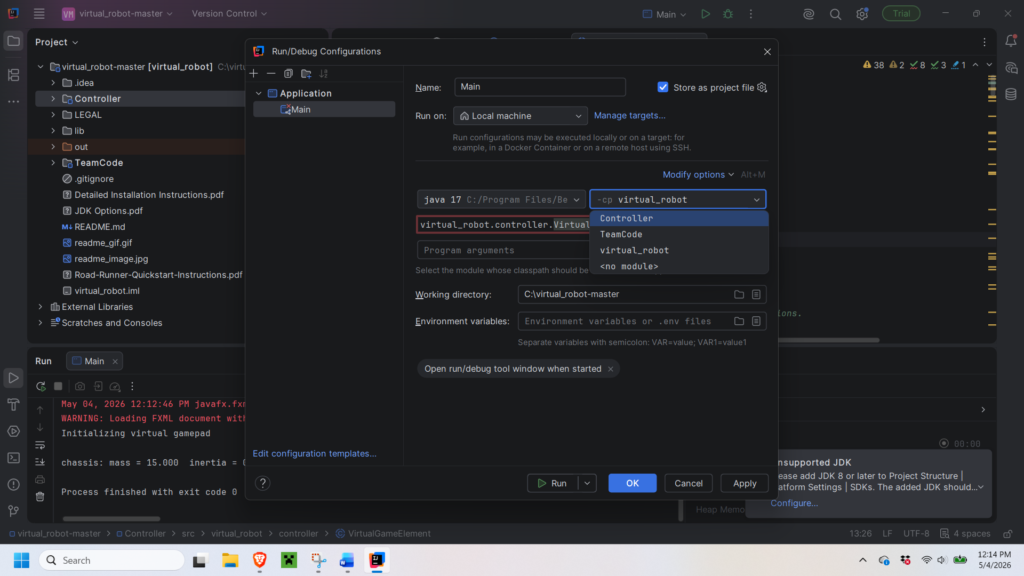
Step-(31) Then open the other dropdown and select controller then click apply and ok
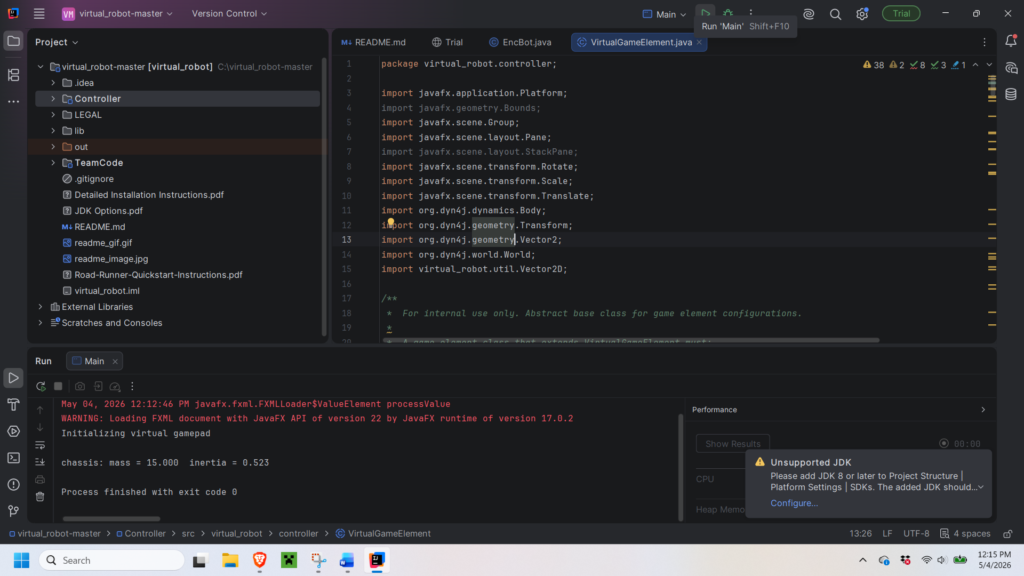
Step-(31) Then click run “main”
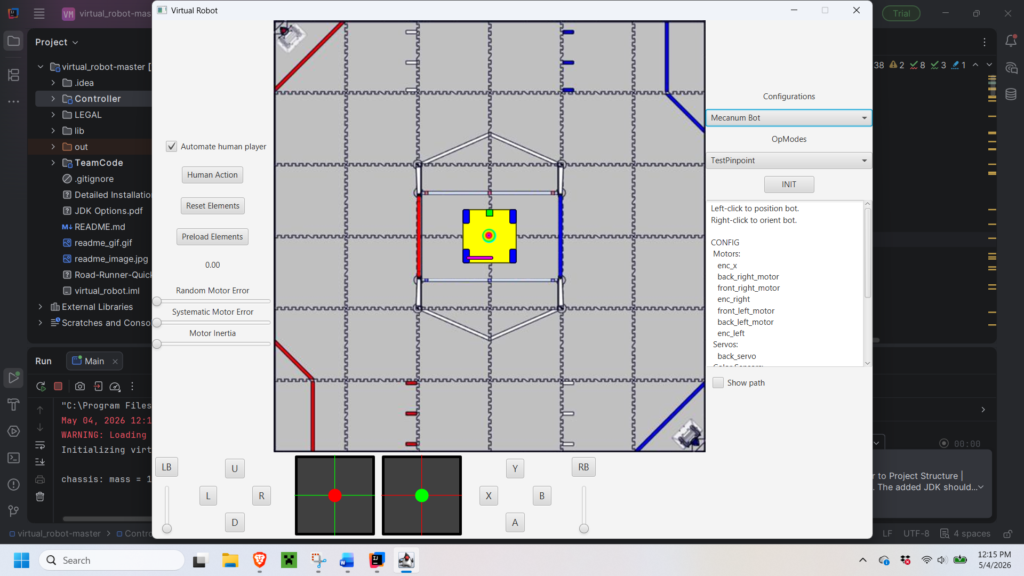
Step-(32) You have successfully installed the emulator